


Outdoor Receiving Antenna for Shortwave Listening
What is Outdoor shortwave antenna (Long wire, random wire, inverted L and receiving dipole): how to choose, build and install them
Quick summary: Outdoor Receiving Antenna
- A simple wire can be an outdoor receiving antenna, is the biggest single upgrade for a shortwave listener.
- Height, clear space and distance from noise matter more than exact wire length.
- A long wire covers many bands. A dipole is better on one chosen band.
- Keep the wire far from power lines. Safety comes before signal.
- Test every change on a known station and keep notes.
Introduction: Why go outdoor antenna
Our Article, shortwave antenna basics: How antenna works explained why a telescopic whip often disappoints. The cure is usually a wire, placed outside and away from the house. Outdoors the wire is longer, higher and further from household noise.
This article covers four practical designs. They are the long wire, the random wire, the inverted L and the receiving half wave dipole. All four are cheap. All four can be built in an afternoon. Indoor listeners should read Article 3 instead. Loops and active antennas appear in Articles 6 and 7.
Basic principles in brief
You only need three ideas from "Shortwave Antenna Basics" here.
- A longer wire collects more signal, but the pattern becomes more complex at higher frequencies.
- A resonant dipole is efficient on its design band. A non resonant wire works on many bands.
- At the lower shortwave bands, noise is often the limit. A better signal-to-noise ratio matters more than a stronger signal.
The four designs at a glance
| Design | Best for | Coverage | Needs |
| Long wire | Rural and suburban listeners with space | Many bands | Matching device, ground or counterpoise |
| Random wire | Any listener who wants a quick start | Many bands | Same as long wire |
| Inverted L | Listeners with one high support and limited length | Many bands, often good on lower bands | Matching device, ground |
| Receiving dipole | Listeners who favour one band | One band, with some use on others | Coax, balun, two supports |
The long wire and the random wire are the same idea. A long wire is cut with some care. A random wire is simply whatever length fits your space. For receiving, the difference is small.
Materials and components
For every design
- Wire: 1 to 2 mm stranded copper, or copper-clad steel for long spans. Insulated wire is fine and resists corrosion.
- Insulators: ceramic, glass or strong plastic at each end. Use at least two.
- Rope: UV-resistant nylon or polyester. Avoid cotton, which rots in the monsoon.
- A pulley or elastic cord at one end, so wind does not snap the wire.
- Waterproof tape or self-amalgamating tape for outdoor joints.
- Stainless steel or galvanized hooks and screws.
For long wire, random wire and inverted L
- A 9:1 unun, or a 4:1 unun, for a 50 ohm coaxial connection. A simple direct connection is possible on some portable radios.
- Coaxial cable, 50 ohm, for the lead in.
- A ground rod and a short ground wire, or a counterpoise wire.
And for the dipole
- A centre insulator with a coax connector.
- A 1:1 balun, or a choke balun made on the coax.
- Coaxial cable, 50 ohm or 75 ohm.
Article 4 explains the matching devices, cable and connectors in detail. Here we only list what you need.
Choosing the location
Spend time on this step. It pays more than any other.
- Go as high as you safely can. Five to ten metres is a good target for most listeners.
- Keep the wire clear of trees. Wet leaves absorb signal in the rainy season.
- Keep it away from metal roofs, gutters and large metal objects.
- Stay far from power lines, street lamps, solar panel inverters and phone chargers.
- Route the lead in so it leaves the wire at a right angle to house wiring. Do not run it in parallel with mains cables.
- Pick a spot where a fallen wire cannot reach a power line.
For urban homes, a rooftop or balcony may be your only choice. Use the longest clear span you can find. Even ten metres of well placed wire can work very well.
The long wire and the random wire Shortwave Antenna
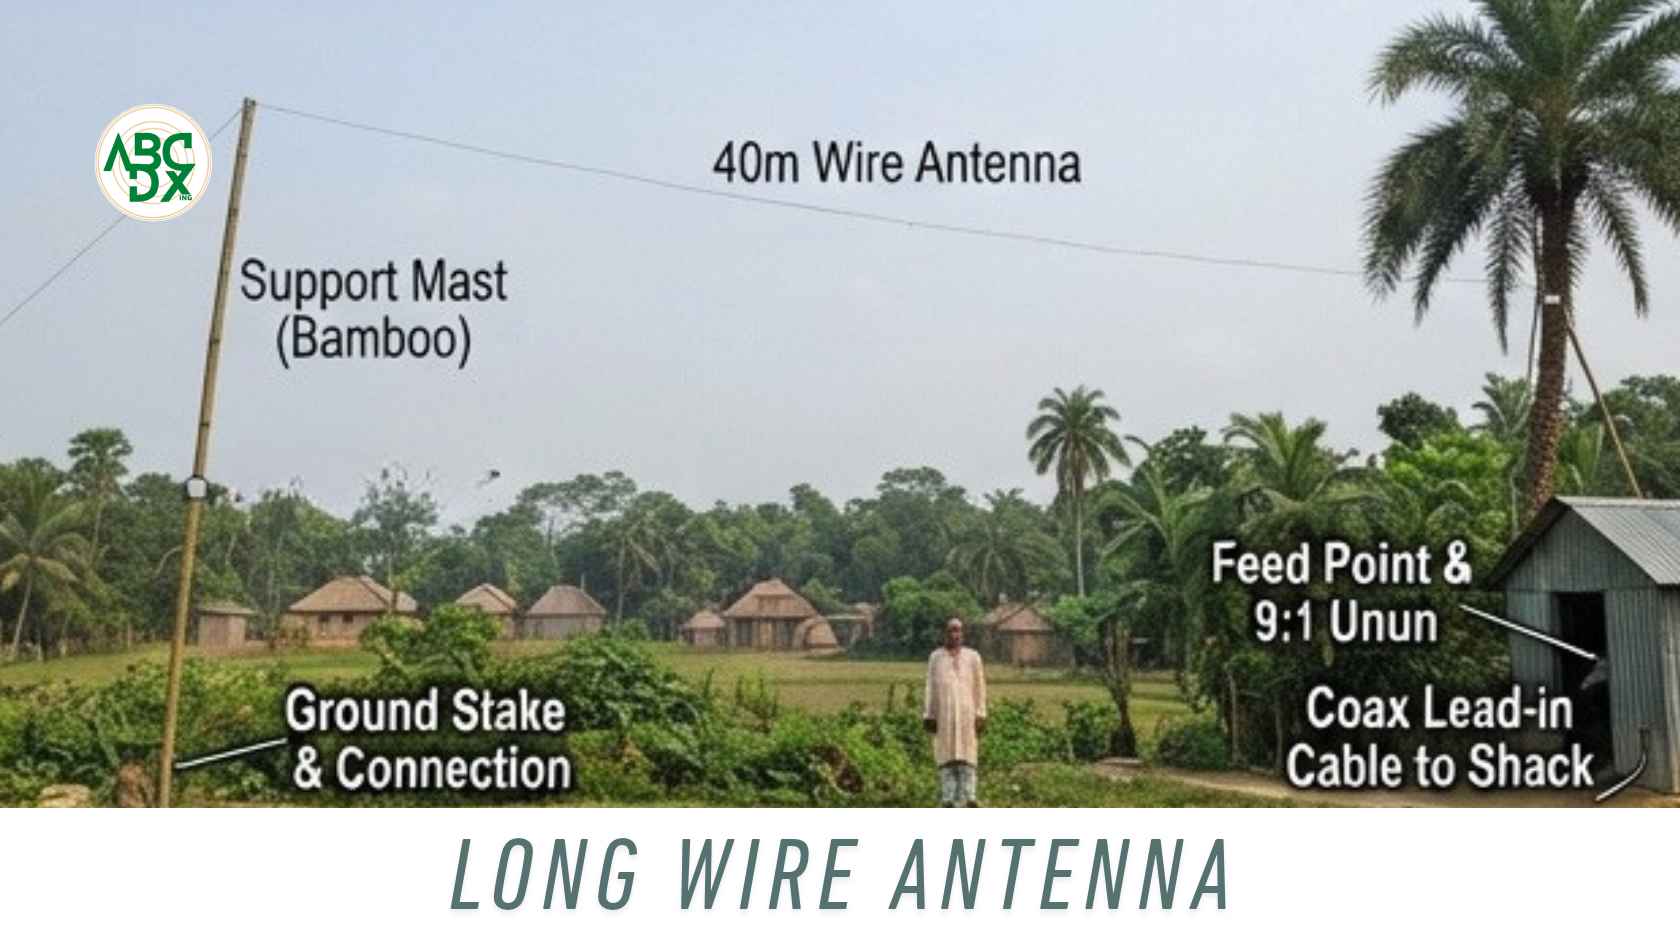
What it is. A single wire stretched between two supports, fed at one end. The far end is left free.
Length. There is no magic number. For general shortwave listening, 15 to 30 metres is a good range. Longer wires give more signal. They also develop stronger directional lobes on higher bands. If space is limited, shorter still works.
Step by step
- Choose two supports. A mast, tree trunk or rooftop pole can work. Check that both are safe to use.
- Attach an insulator at each end of the wire.
- Fix one end to the far support. Use rope between the insulator and the support.
- At the other end, use elastic cord or a pulley and weight. This lets the wire move in wind without breaking.
- Pull the wire up. Aim for a gentle sag, not a tight line.
- Connect the feed end to the unun. Keep this joint dry and tight.
- Connect the unun to coax. Run the coax to the receiver along a safe path.
- Add a ground rod or counterpoise at the UNUN. Article 4 explains how.
Direct connection for portable radios. Many portable radios have an external antenna socket. Others do not. For these, you can wrap the wire a few turns around the whip or clip it to the whip tip. Use a few turns. Too much coupling can overload a sensitive receiver. If the radio has no whip, the radio's manual may suggest a method.
The inverted L shortwave antenna
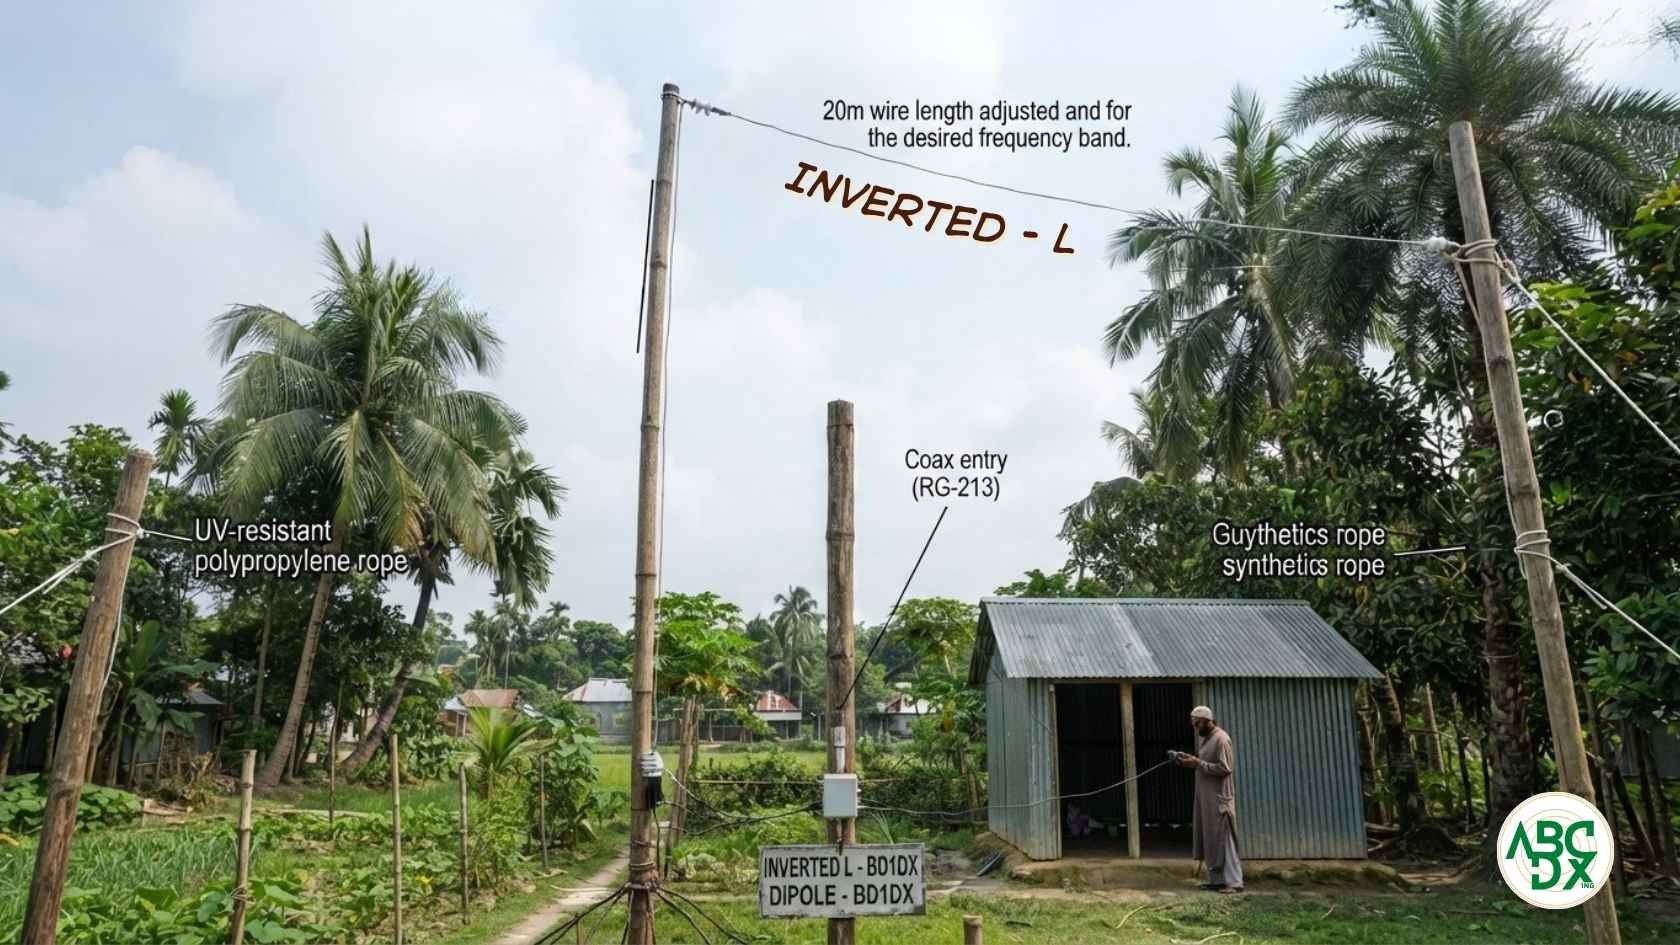
What it is. A vertical wire rising from the feed point, with the rest running horizontally. It looks like an upside down letter L.
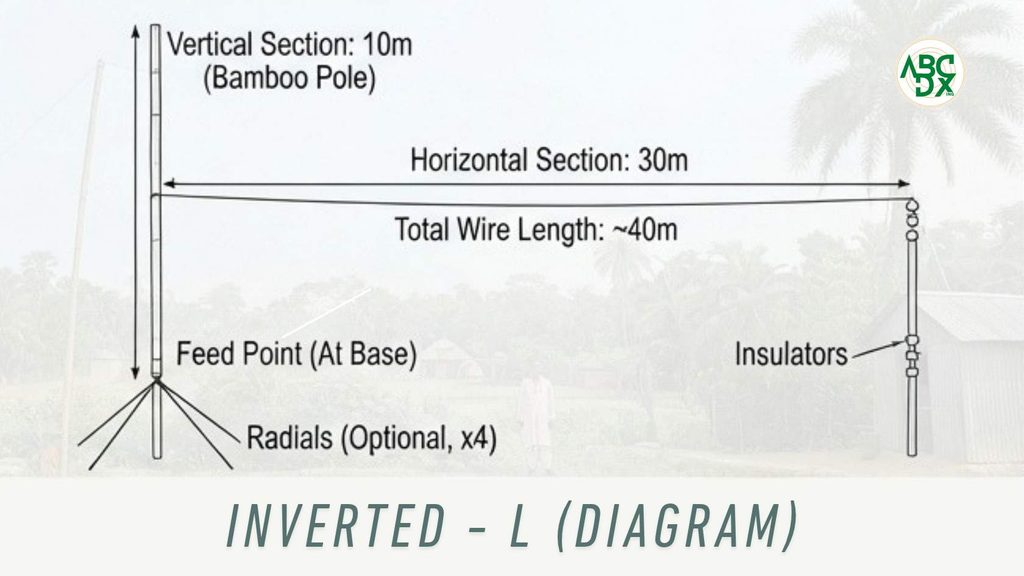
Why use it. It works well when you have one high support but not much horizontal space. The vertical part is sensitive to many directions. The horizontal part adds extra collecting length.
Typical dimensions. A vertical part of about five to ten metres, and a horizontal part of about ten to twenty metres, is a good starting point. These are not strict values. Adjust to your site.
Step by step
- Fix a high support, such as a mast or a tall tree trunk.
- Fix a lower support at the far end of the horizontal section.
- Run the wire up the vertical section with insulators, away from walls.
- Run the horizontal part at a steady height. Use elastic cord at the far end.
- Take the feed from the bottom of the vertical section. Connect it to the unun.
- Add a good ground connection or a counterpoise. The inverted L depends on this more than a horizontal wire does.
- Run coax to the receiver.
The receiving half-wave dipole
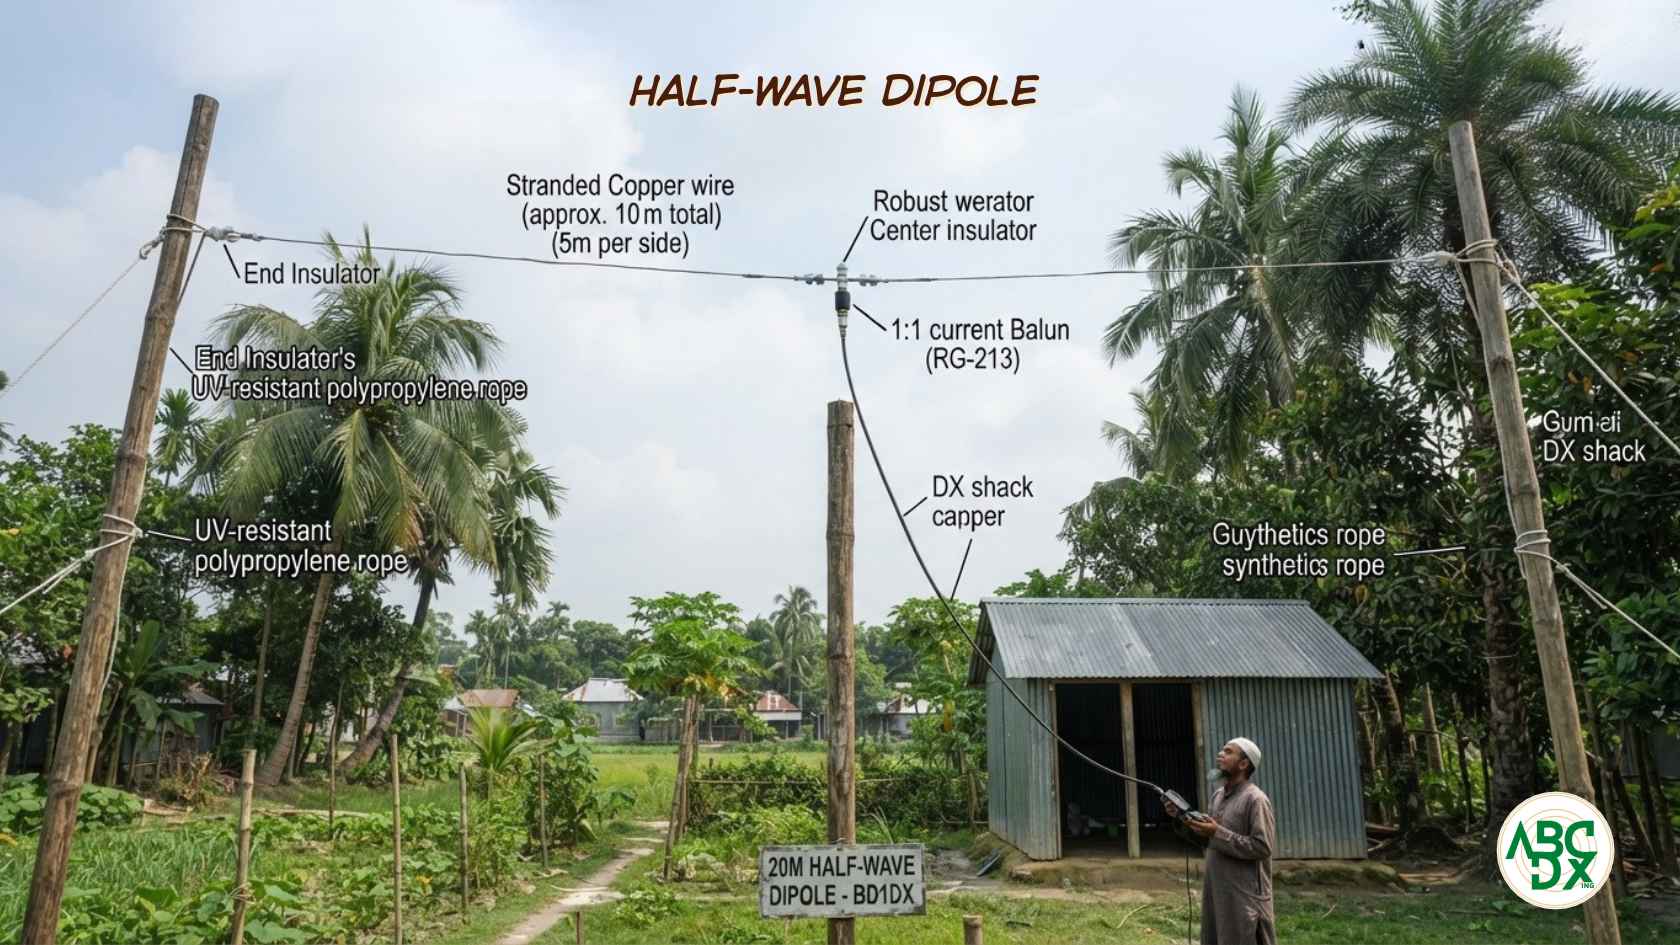
What it is. A center-fed wire cut to half a wavelength on your favourite band. Each leg is a quarter of a wavelength.
Length. A common starting formula is total length (m) = 143/frequency (MHz).
This is only a starting point. The final length depends on height, wire, and surroundings.
| Band | Example frequency | Approx. total length |
| 49 meter | 6.0 MHz | about 23.8 m |
| 31 meter | 9.7 MHz | about 14.7 m |
| 19 meter | 15.4 MHz | about 9.3 m |
These values come from the formula above. Treat them as starting points and check them in your own setting.
Pattern. A horizontal dipole is strongest broadside to the wire. Point the broad side toward the regions you most want to hear.
Step by step
- Calculate the total length for your chosen band. Add a little extra for trimming.
- Cut two equal legs. Attach each to the centre insulator.
- Fit the balun at the centre. Connect the coax.
- Fix insulators at each end of the legs.
- Raise the dipole between two supports. Keep it as high as is safe.
- Let the coax hang down at a right angle to the wire for a few metres, if you can.
- Add a ferrite choke on the coax near the receiver. Article 4 covers this.
A dipole cut for one band can still be used on other bands. It will not be as good there. Many listeners build two or three dipoles for their favourite bands.
Installation and feeding the receiver
- Keep the lead-in short, tidy and away from mains wires.
- Enter the house at one point. Seal the opening against rain and insects.
- Use coax for the lead-in. It picks up less house noise than bare wire.
- Add a ferrite choke on the coax close to the receiver. It reduces noise travelling along the outside of the cable.
- Consider an antenna switch, so that you can change antennas without touching connectors.
Testing and comparing
Good testing needs a method.
- Choose a steady station that you know well. Note the frequency and UTC time.
- Listen first with your old antenna. Record signal and noise on your usual scale, such as SIO or SINPO.
- Change to the new antenna. Test the same frequency within a few minutes.
- Repeat on a low band and a high band.
- Judge readability, not only the S meter. A lower noise floor can matter more than higher signal.
- Keep a log. Include date, UTC time, frequency, receiver, antenna and observations.
Propagation changes quickly, so memory alone is unreliable.
Discover more on Antenna: Basic, Brief and Build

Shortwave Antenna Basics
From basic antenna principles to practical SW reception
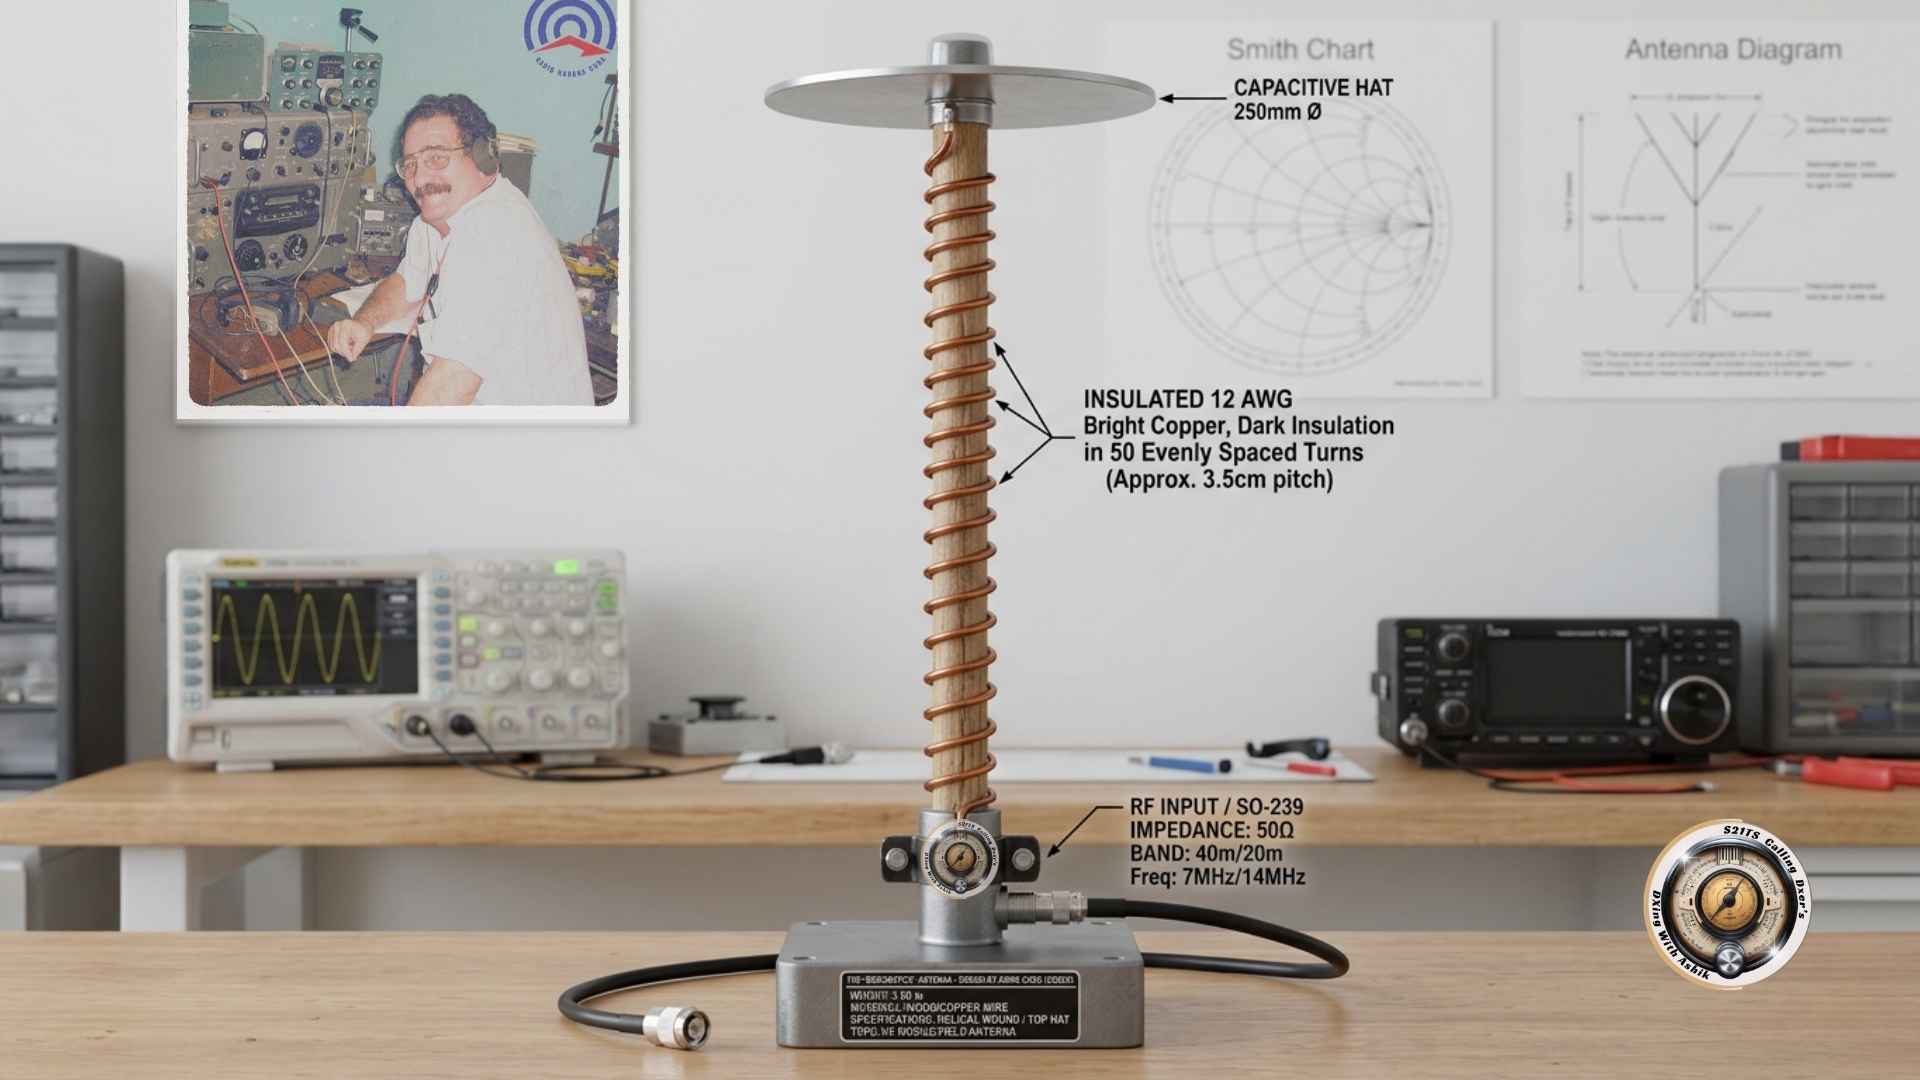
Arnie Coro Broomstick
Step-by-step expert guide to building Broomstick Antenna.
WSABD Antenna Guide
How to Building a Simple Shortwave Receiving Antenna
Advantages and limitations
| Design | Advantages | Limitations |
| Long or random wire | Simple, cheap, many bands | Needs matching and ground. Can pick up noise. |
| Inverted L | Compact footprint, good with one tall support | Depends on a good ground or counterpoise |
| Receiving dipole | Balanced, often quieter, good on its band | Needs two supports. Narrow coverage. |
Safety
Outdoor antennas carry real risks. Please read this section carefully.
- Stay far from power lines. Contact can kill. Never throw a wire or rope over a line.
- Assume that a falling wire could reach a line. Choose a site where this cannot happen.
- Do not use or touch the antenna during thunderstorms. Disconnect the lead in and move it outside, away from the receiver.
- A wire antenna is not lightning protection. Do not rely on any simple measure to make it safe.
- Use a stable ladder and a helper. Wear eye protection. Do not climb in wet or windy weather.
- Check the building owner's permission and local rules.
- Do not ground the antenna to the mains earth pin or to gas pipes.
Grounding is covered in Article 4.
Troubleshooting
| Problem | Likely cause | What to try |
| Strong buzz or hash | House wiring, chargers, LED lamps | Move the wire away. Switch off nearby devices one by one. Add a ferrite choke. |
| Weak signals everywhere | Wire too low, poor joint, bad connector | Raise the wire. Check joints and connectors. |
| Signals overload or distort | Long wire on a sensitive receiver | Reduce coupling. Use fewer turns on the whip. Try an attenuator. |
| Noise changes with weather | Wet insulators, corroded joints | Clean and seal joints. Replace worn insulators. |
| Good on one band, poor on others | Dipole resonance or lobes | Try another band or direction. Consider a second dipole. |
| Wire breaks in wind | No allowance for movement | Add elastic cord. Replace brittle wire. |
- For Bangladesh, plan for monsoon storms. Seal joints and carry spare rope.
- Urban listeners should use the clear height of a rooftop. Suburban and rural listeners can try a longer wire.
- Record each change in your log. This shows what really helped.
- Compare antennas on the same frequency at nearly the same time.
Conclusion
A simple outdoor wire can transform your listening. Choose the design that fits your space and your favorite bands. Keep it high, clear and safe. Test it with care. In Article 3, we turn to the indoor listener. There, space and noise are the main challenges.